DIY Wolverine Helmet Keychain - Llavero de Wolverine [ENG-ESP]
Hello dear friends, I hope you are all well, working on your beautiful creations, I want to share with you a keychain that I made of Wolverine, the most famous character in superhero movies today, who appeared in the last Deadpool movie. I made this keychain using comics references since it has several uniforms, I made it in the classic style, using aluminum cans, since I had not used this material again for a long time. I hope you like it and are encouraged to replicate it, since it can also be made on paper or cardboard, which is more durable. Below I share with you the process step by step, let's get started!
Hola queridos amigos, espero que todos se encuentren muy bien, trabajando en sus hermosas creaciones, yo quiero compartir con ustedes un llavero que hice de Wolverine, el personaje más famoso actualmente del cine de super héroes, quien salió en la última película de Deadpool. Hice este llavero utilizando las referencias de los comics ya que tiene varios uniformes, lo hice en el estilo clásico, utilizando latas de aluminio, ya que tenía mucho tiempo sin volver a utilizar este material. Espero que les guste y se animen a replicarlo, ya que también se puede hacer en papel o también cartulina que es más duradera. A continuación comparto con ustedes el proceso paso a paso, ¡comencemos!


 |  | |
|---|---|---|
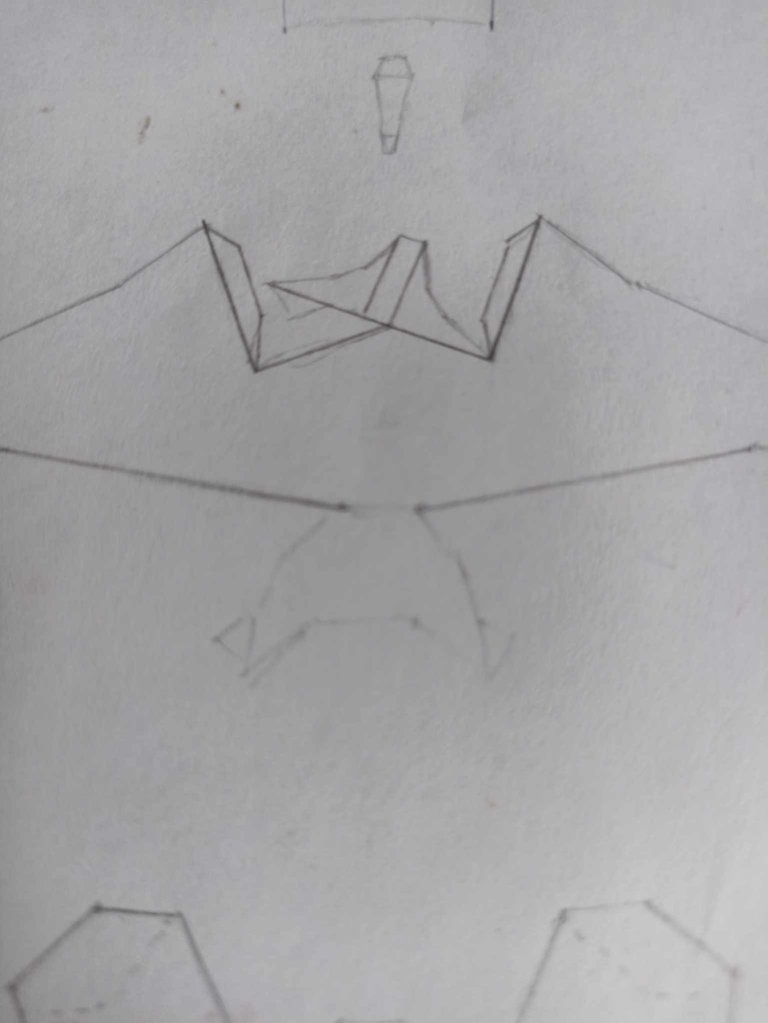 | 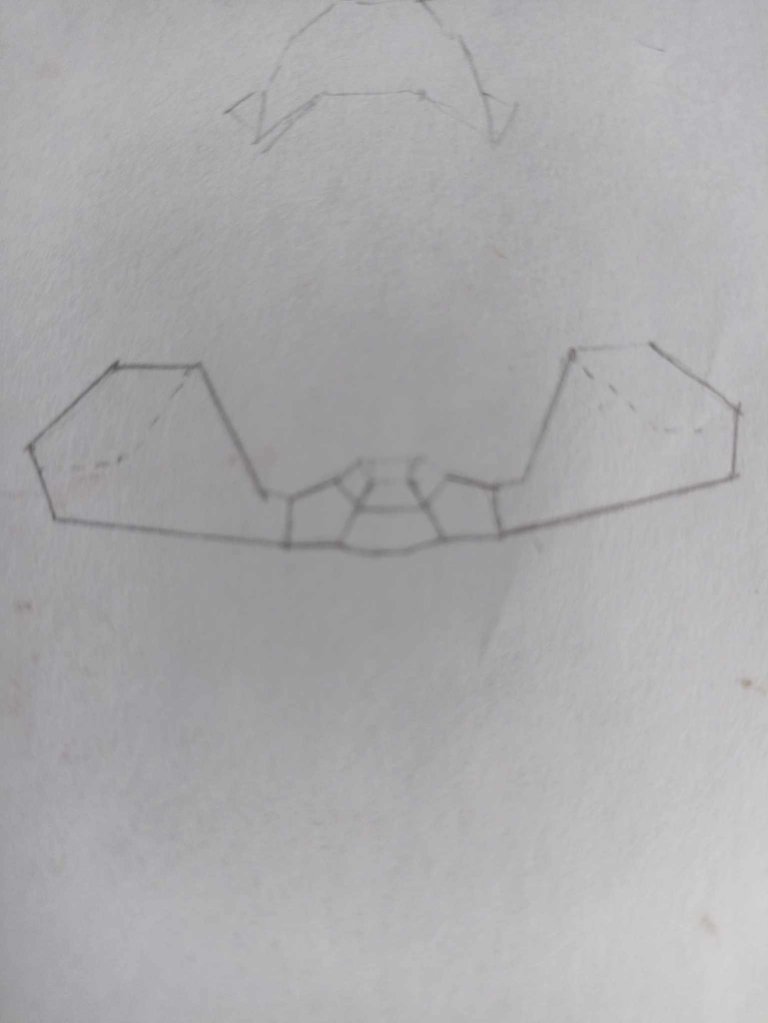 |
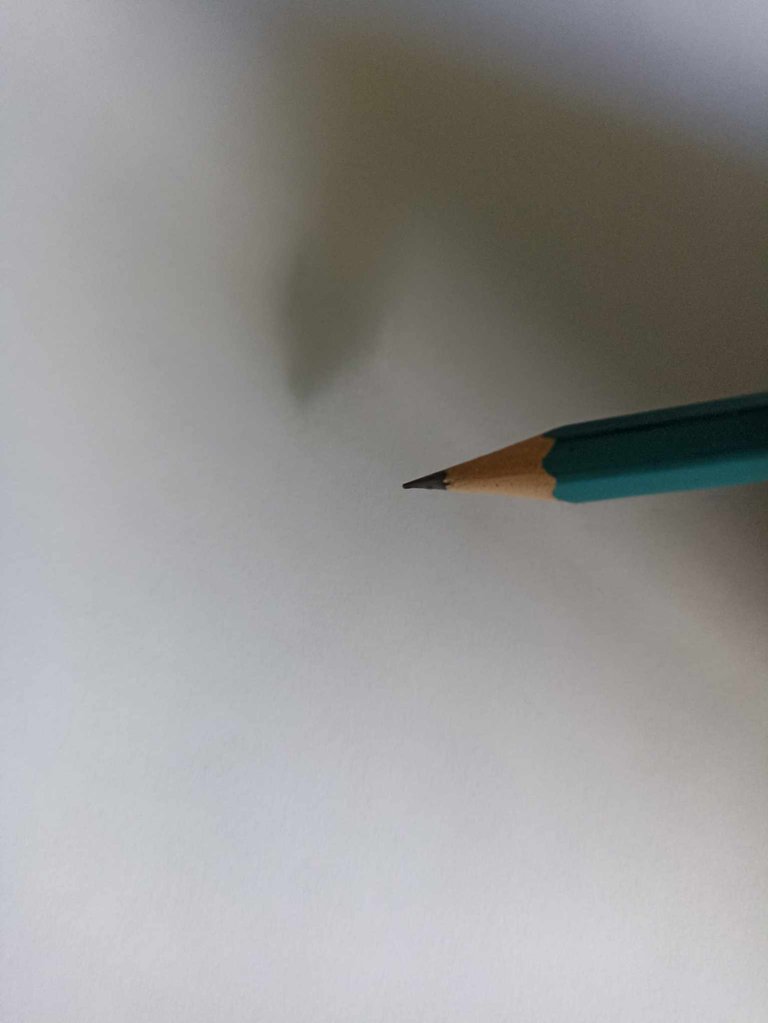
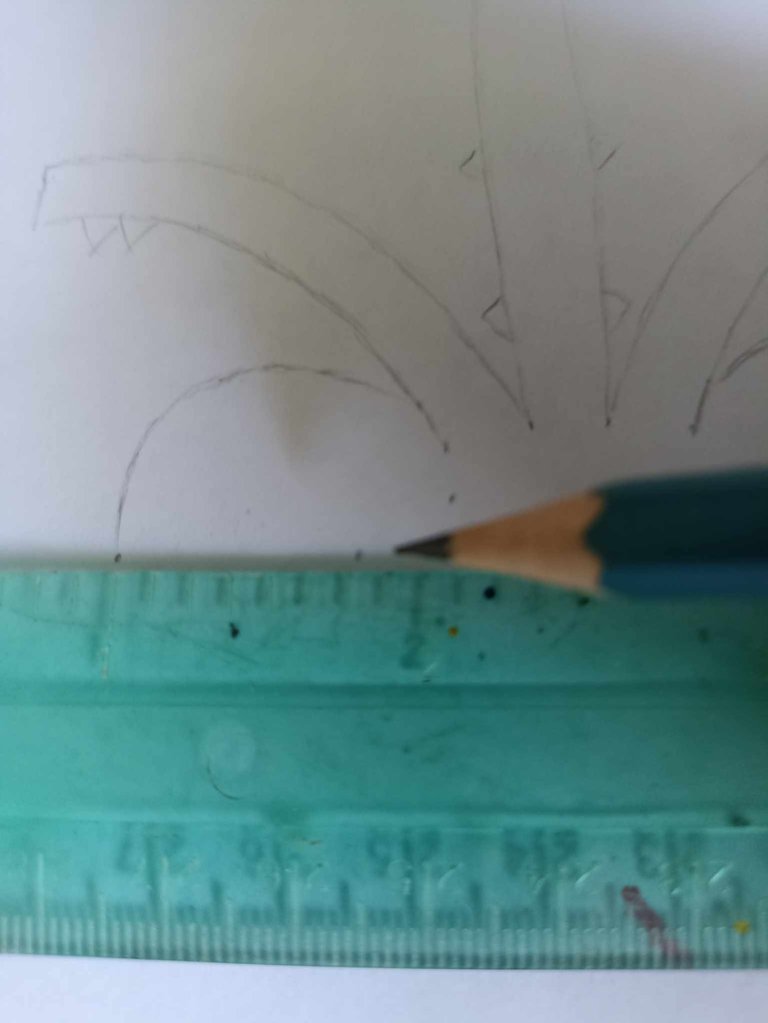
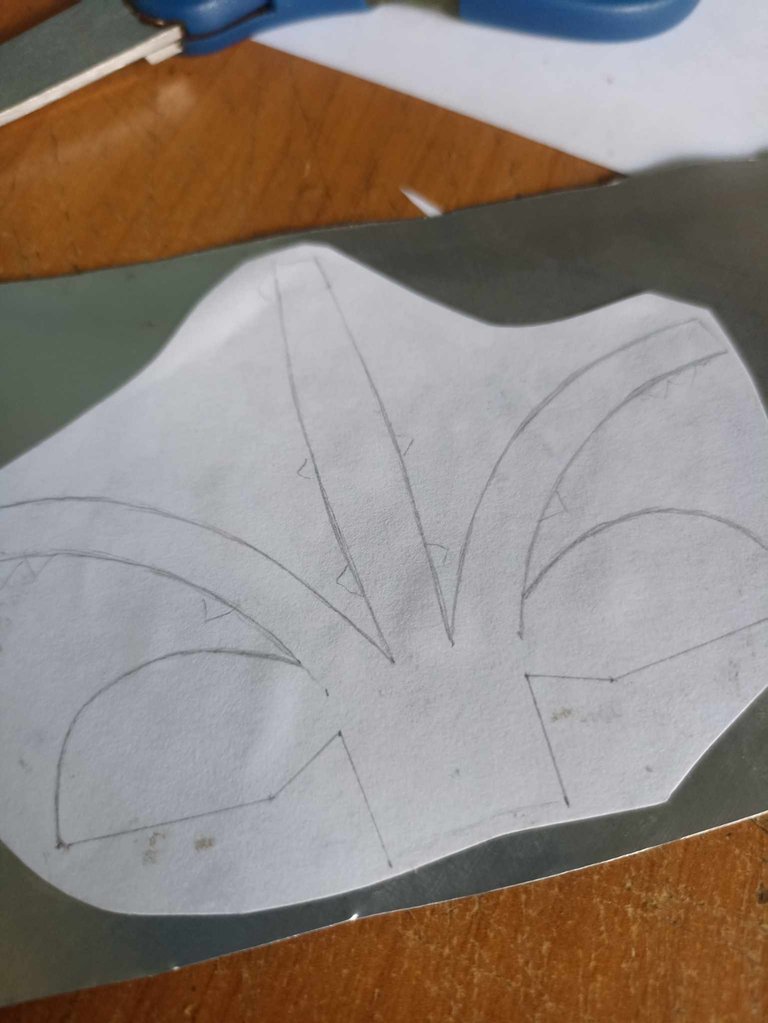
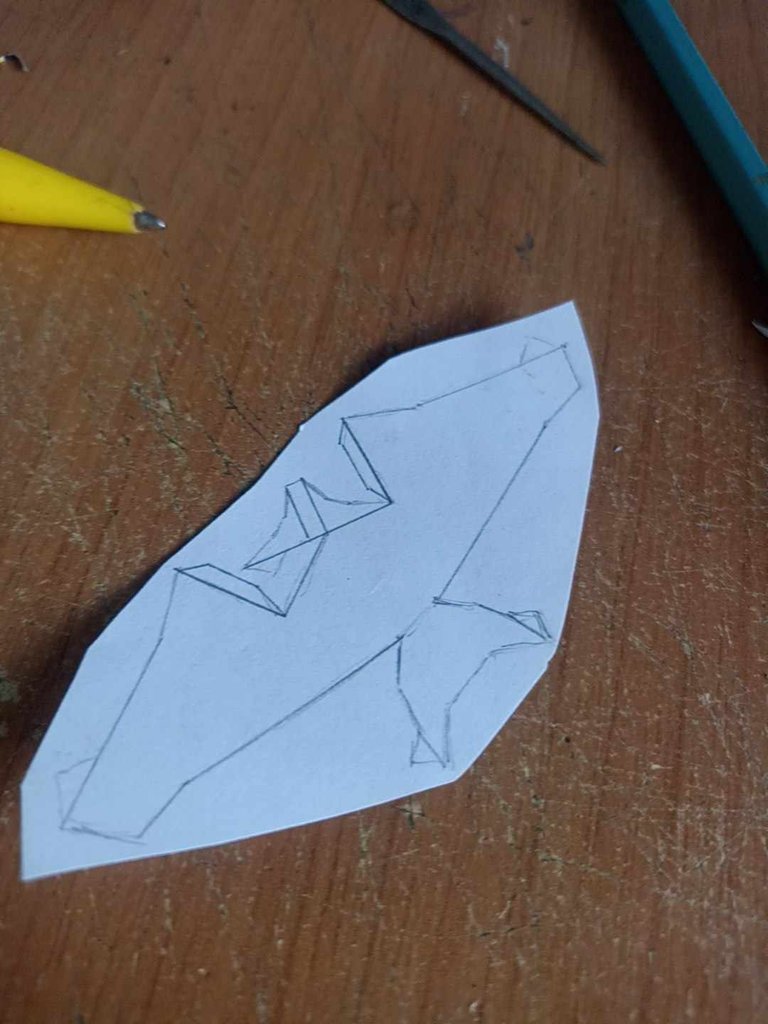
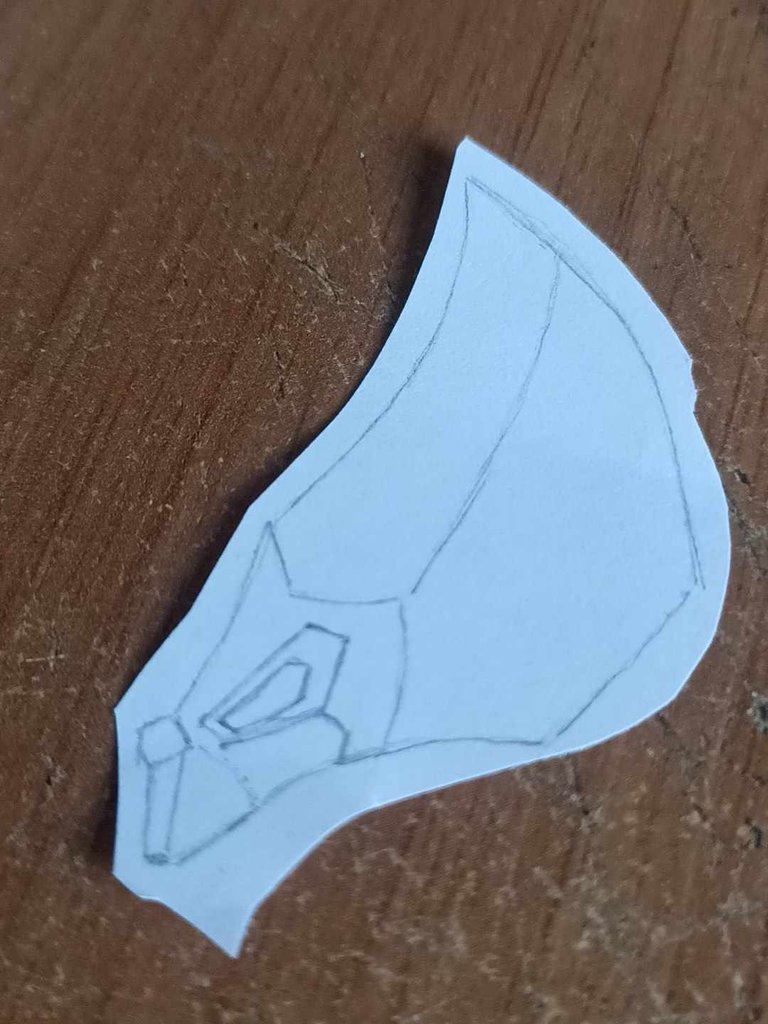
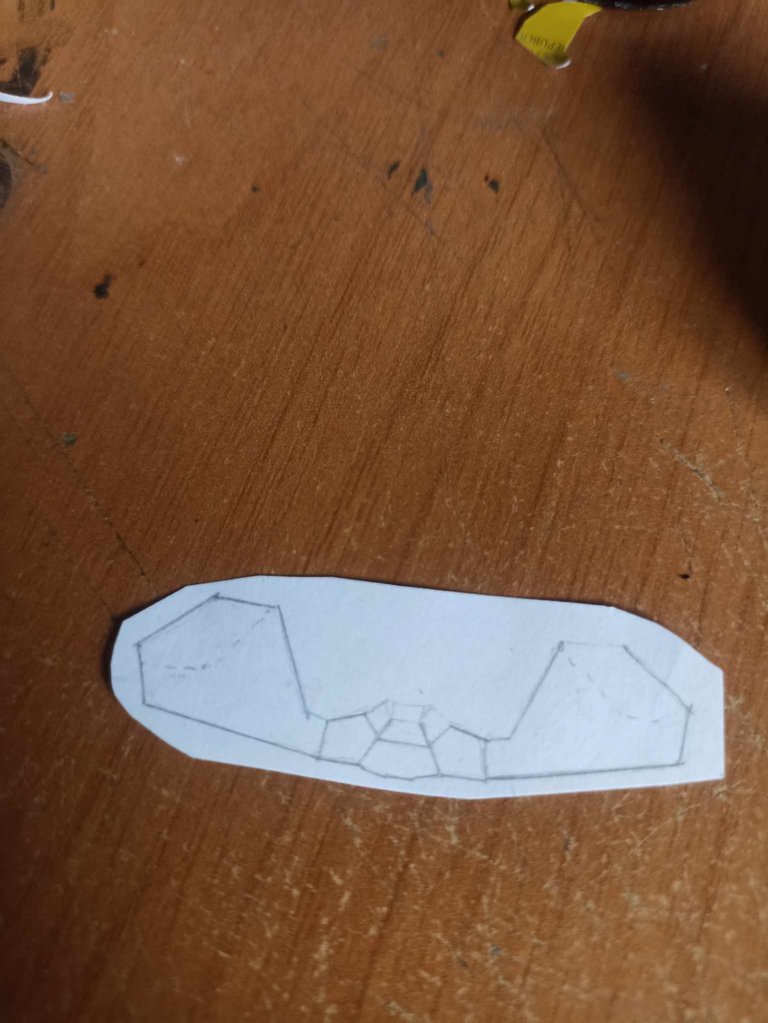
First I made a template on paper, the templates come part by part until I complete the entire shape of Wolverine's head and mask. I drew them with an HB drawing pencil, these templates will then be cut out to stick them on the aluminum and then with scissors little by little I will take out each piece to assemble, just like in papercraft with the difference that here it is aluminum.
En primer lugar hice una plantilla en papel, las plantillas vienen parte por parte hasta completar toda la forma de la cabeza y la máscara de Wolverine. Las dibujé con un lápiz de dibujo HB, estas plantillas luego serán recortadas para pegarlas sobre el aluminio y después con unas tijeras poco a poco ir sacando cada pieza para armar, igual que en el papercraft con la diferencia que aquí es aluminio.
 |  | |
|---|---|---|
 | 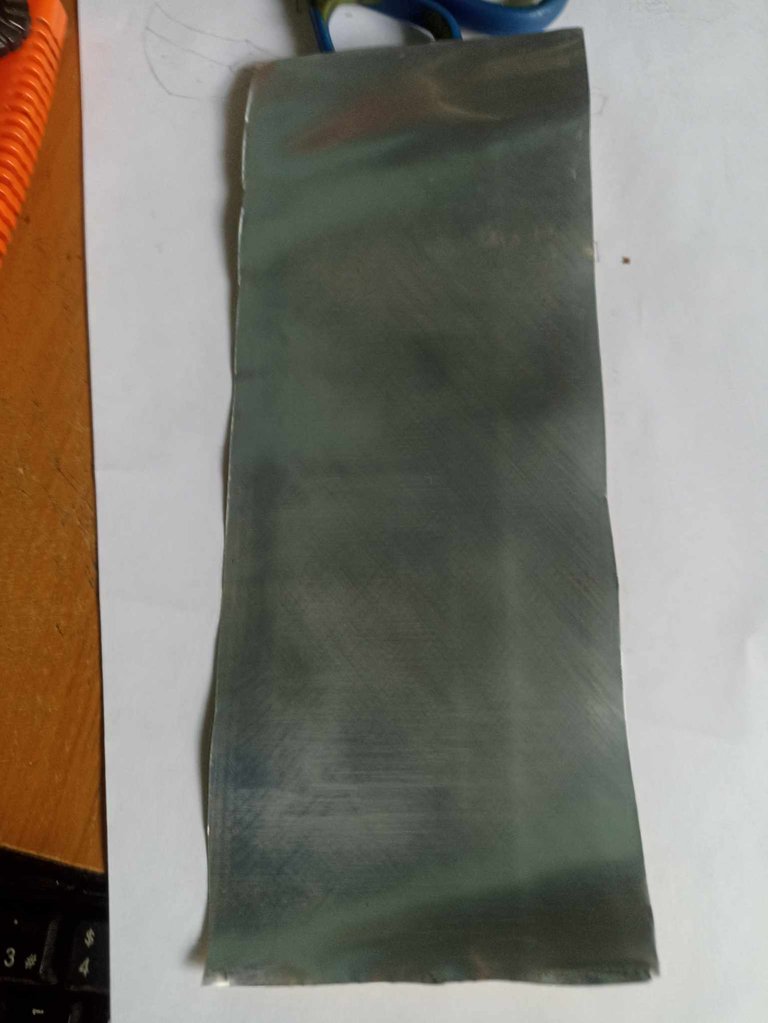 |
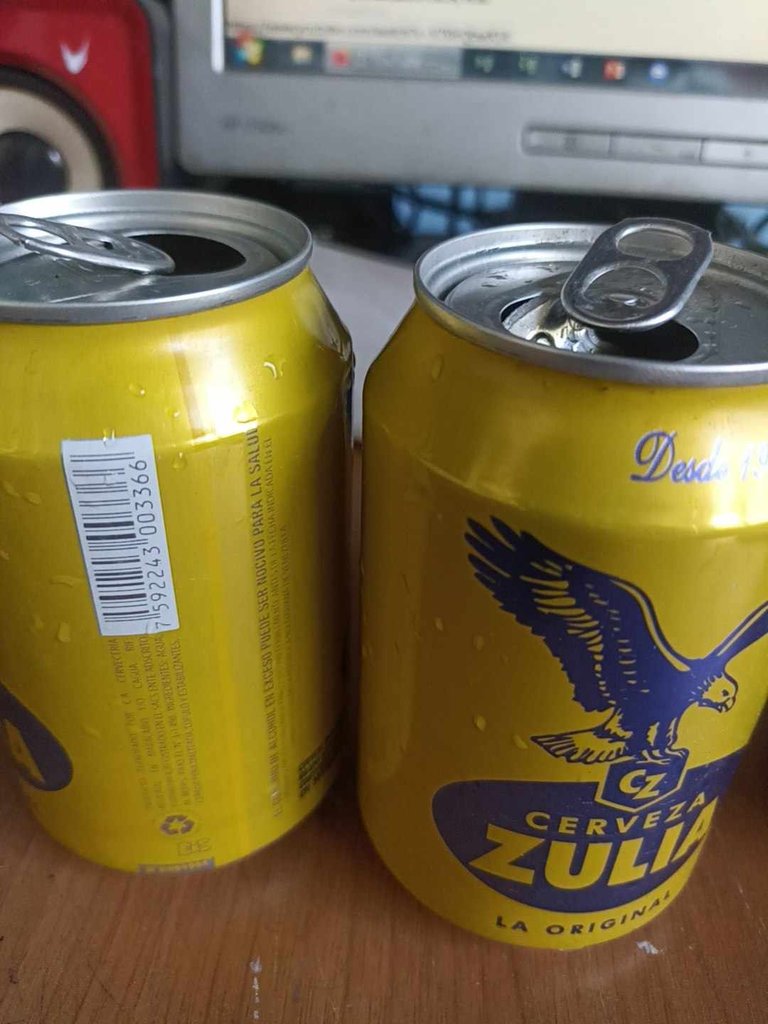
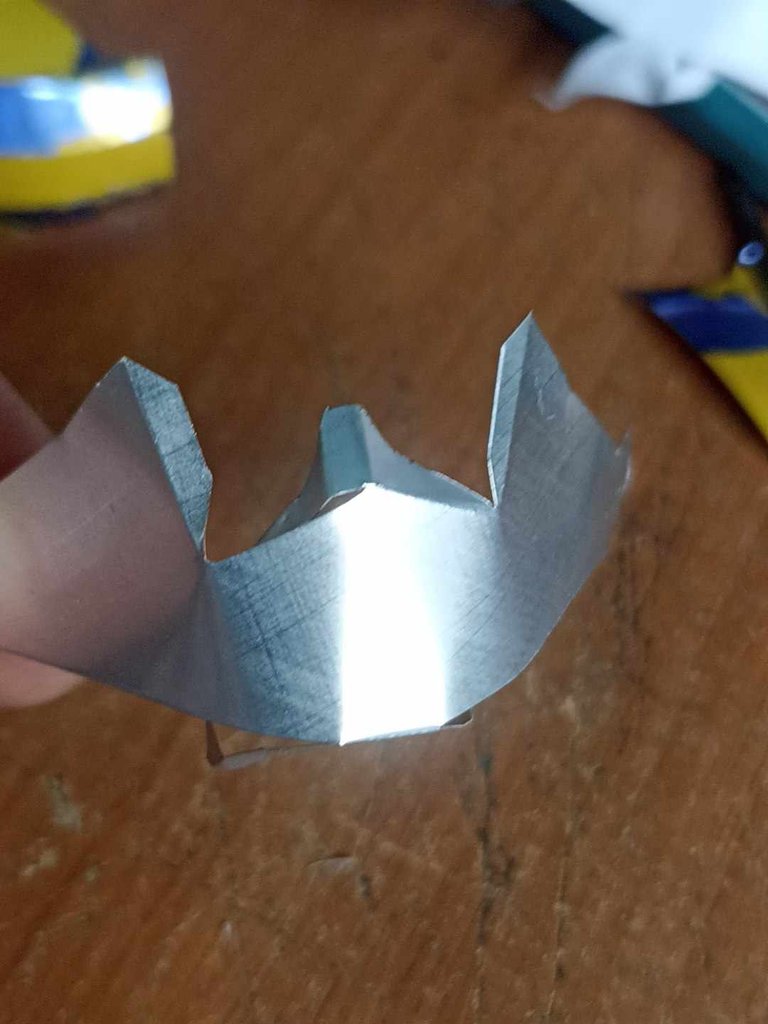
I used 2 cans, since it will be a keychain and it is a small piece it is not necessary to use a lot of aluminum. So with a knife I make a small opening in the can and then with scissors I finish opening the can until I disassemble it. After that I shape it by stretching it until it becomes a thin sheet of aluminum. When it is in this shape it can be used for many things and any kind of crafts.
Utilicé 2 latas, como será un llavero y es una pieza pequeña no es necesario utilizar mucho aluminio. así que con una navaja le hago una pequeña abertura a la lata y luego con unas tijeras termino de abrir la lata hasta desarmarla. Después de ahí le doy forma estirándola hasta convertirla en una fina lámina de aluminio, cuando está en esta forma se puede utilizar para muchas cosas y cualquier clase de manualidades.
 |  |  |
|---|---|---|
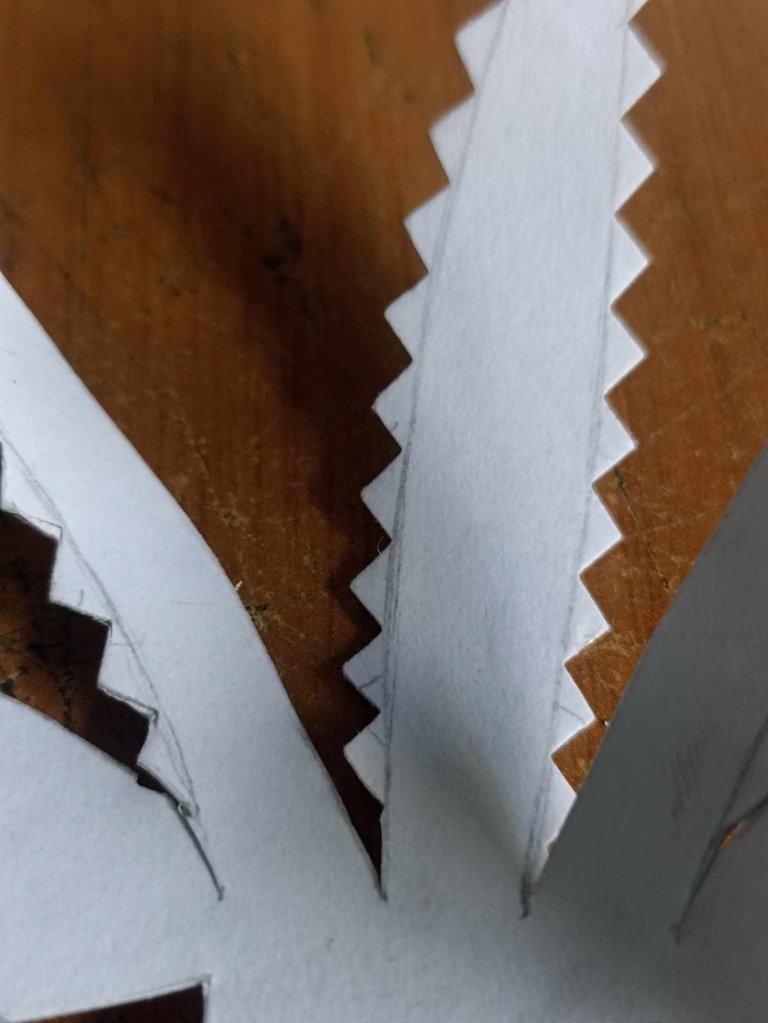 |  |  |
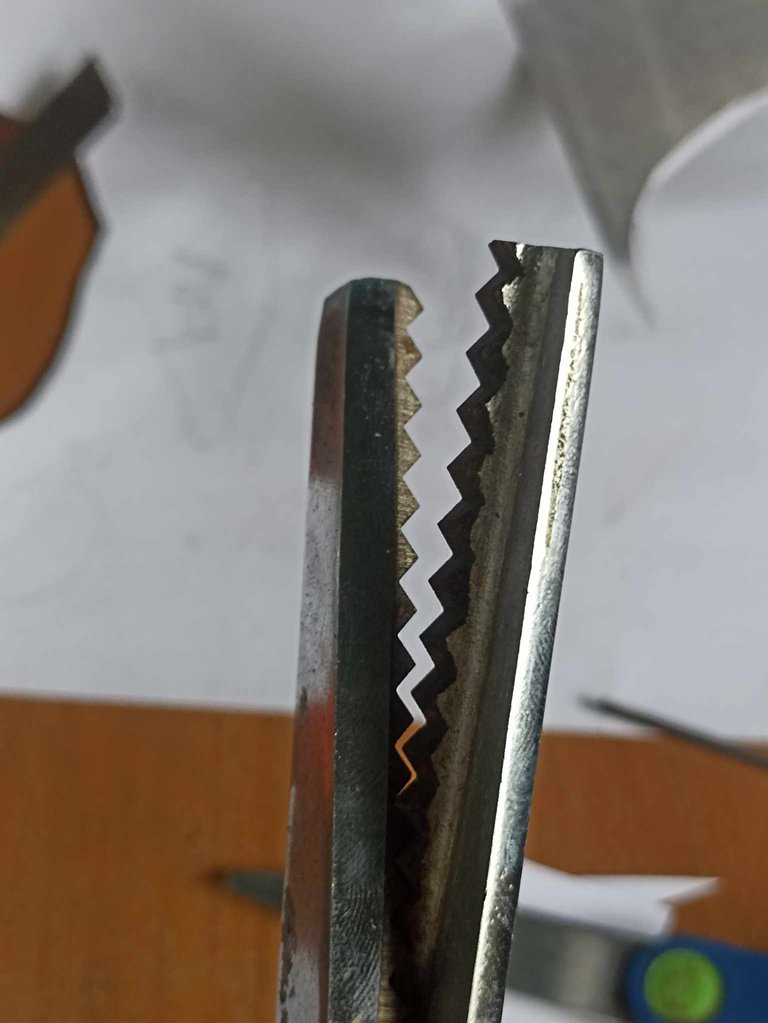
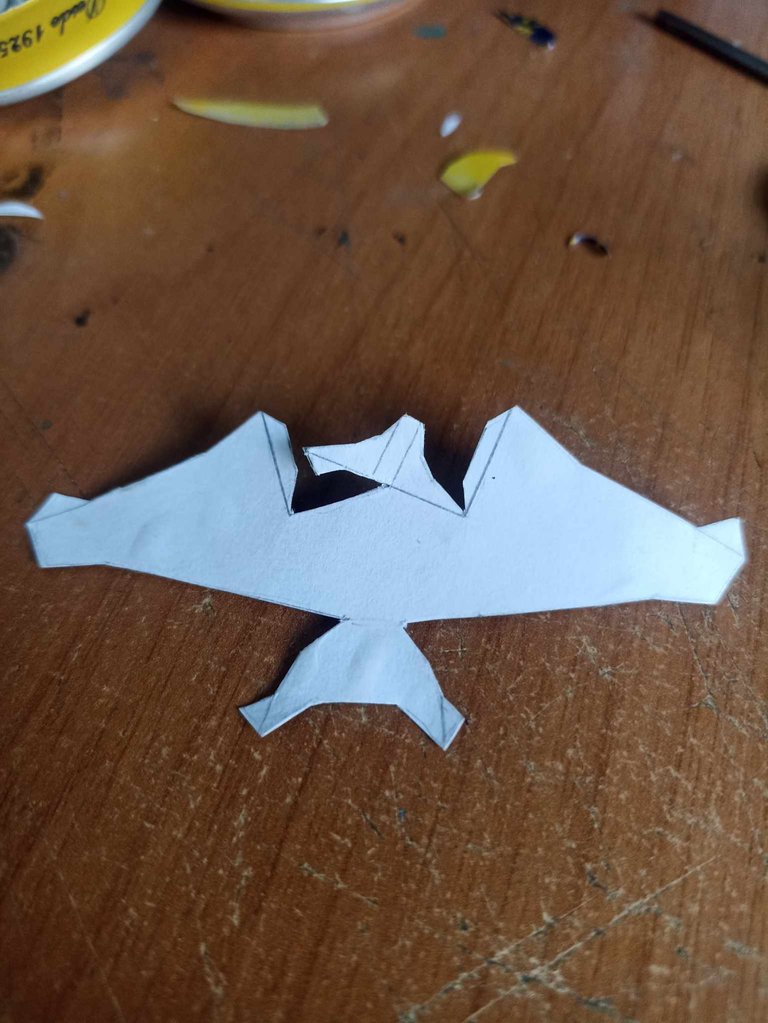
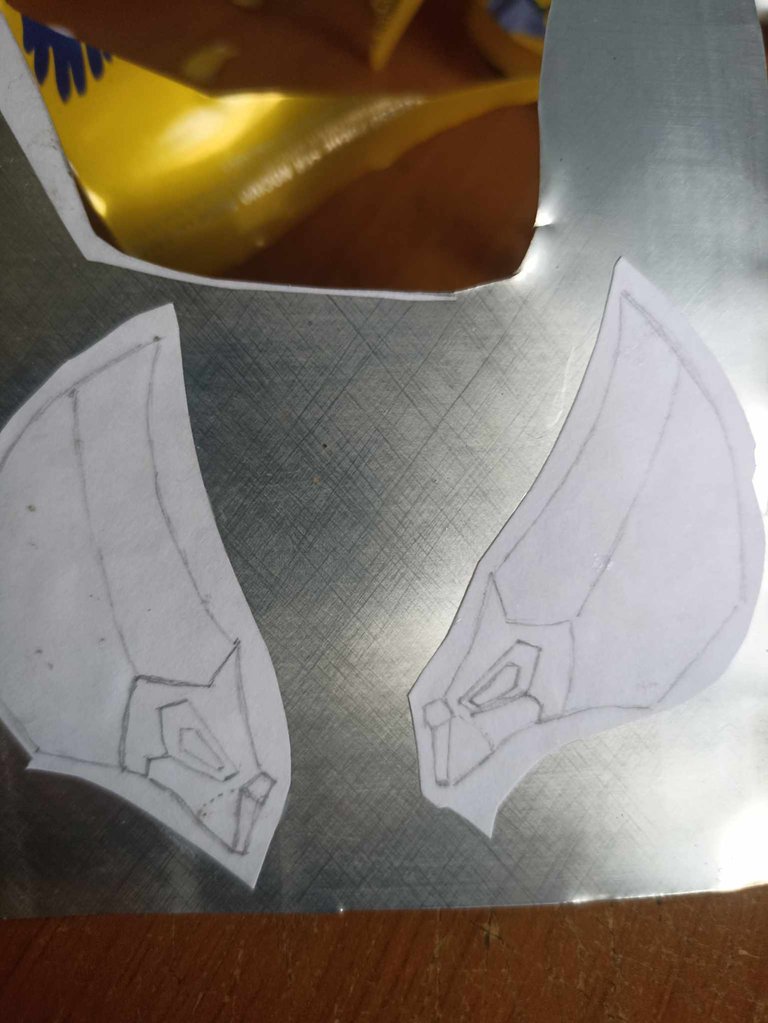
Next I start to cut the templates and stick them with school glue on top of the aluminum, then I cut them with scissors until I get the shape. Finally I use a pair of scissors that has a zic zac cut, it is very useful for crafts of all kinds, to make finished in paper or cardboard, here I use it to cut the edges and thus have enough tabs to place glue to later join them together.
Seguidamente comienzo a cortar las plantillas y a pegarlas con pegamento escolar encima del aluminio, después las corto con unas tijeras hasta sacar la forma, Por último utilizo una tijera que tiene un corte en zic zac, es muy útil para manualidades de todo tipo, para hacer acabados en papel o cartulina, aquí yo la uso para cortar los bordes y así tener pestañas suficiente donde colocar pegamento para después unirlas entre ellas.
 |  | |
|---|---|---|
 |  |
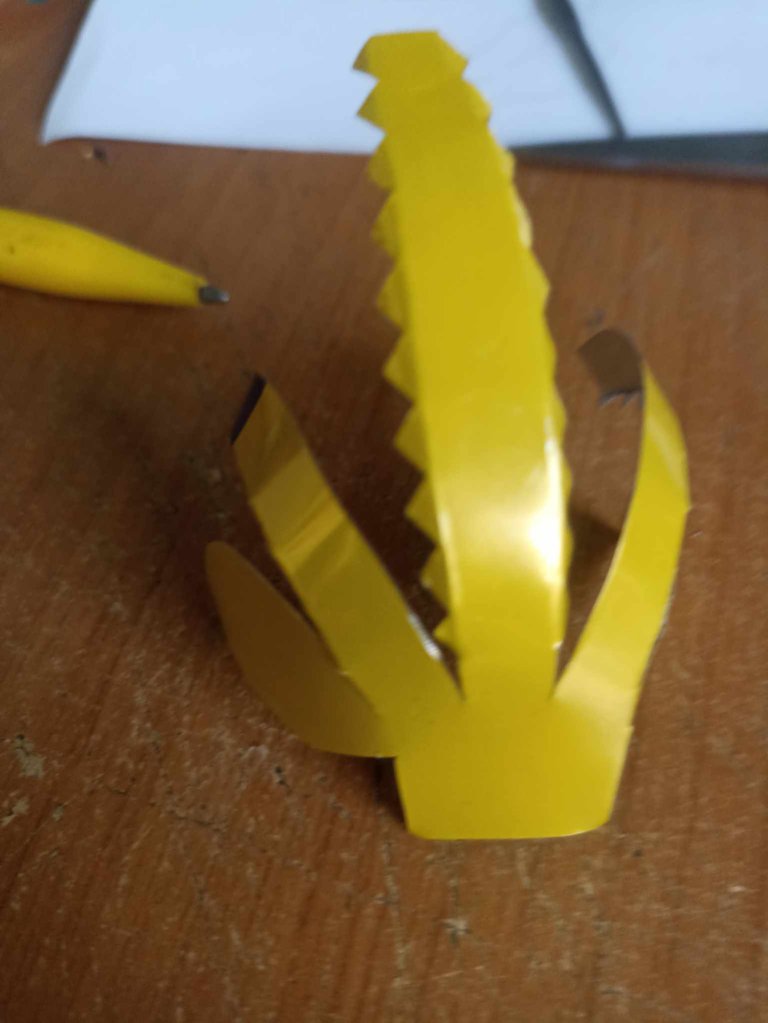
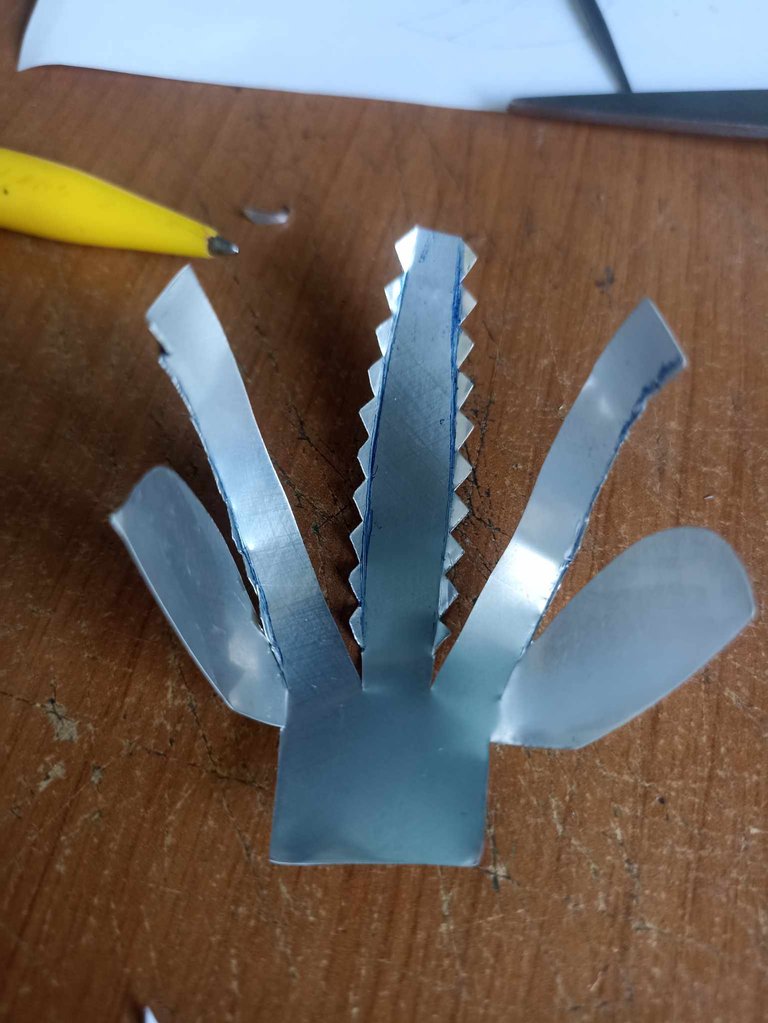
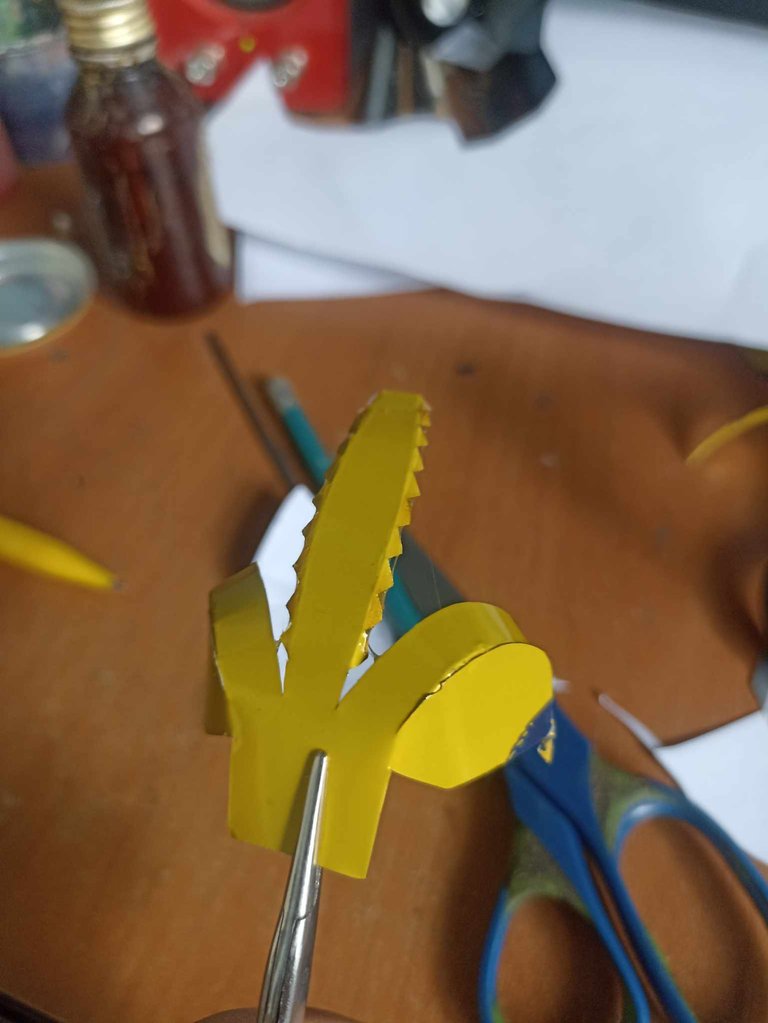
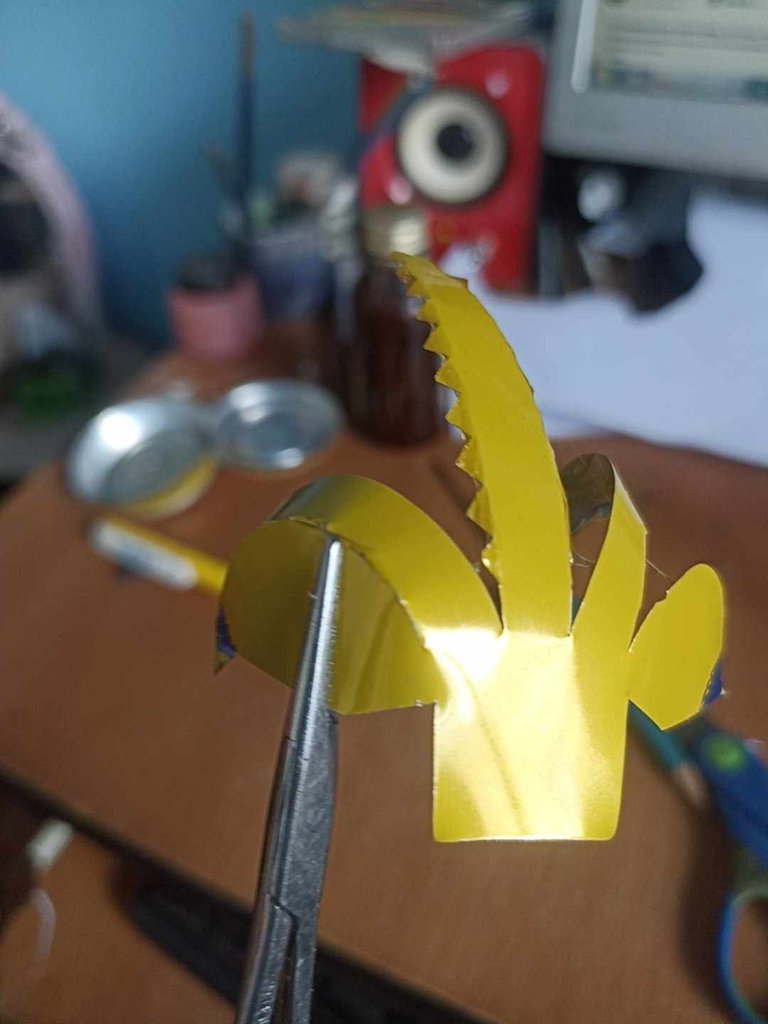
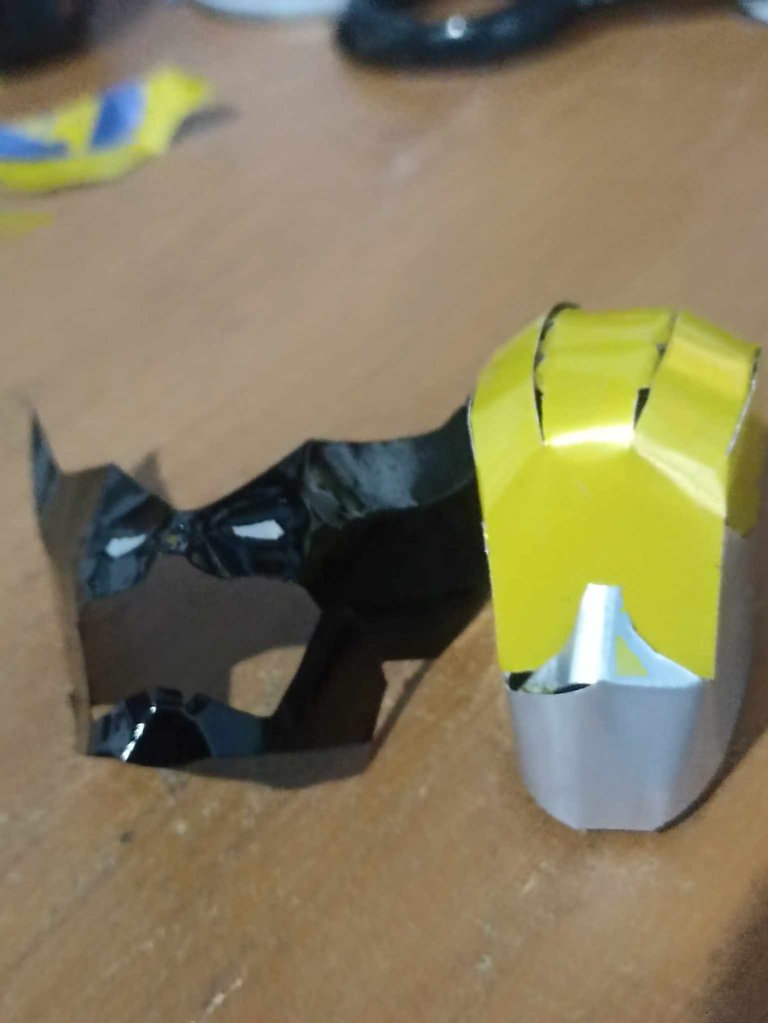
Next, the next step is easier, you just have to carefully put glue on the eyelashes that were cut before with the scissors and join them together little by little. I use tweezers to hold the eyelashes together for a few minutes. After letting it dry for several minutes you can see how the top of the head looks, which for obvious reasons is yellow, like Wolverine's mask.
Seguidamente el paso que viene es más fácil, solo hay que poner pegamento cuidadosamente en las pestañas que se cortaron antes con la tijera y unirlos poco a poco, yo utilizo unas pinzas para así mantener unidos por unos cuantos minutos las pestañas. Luego de dejar secar por varios minutos ya se puede apreciar como queda la parte superior de la cabeza, que por obvias razones va de color amarillo, como la máscara de Wolverine.
 |  | |
|---|---|---|
 |  |
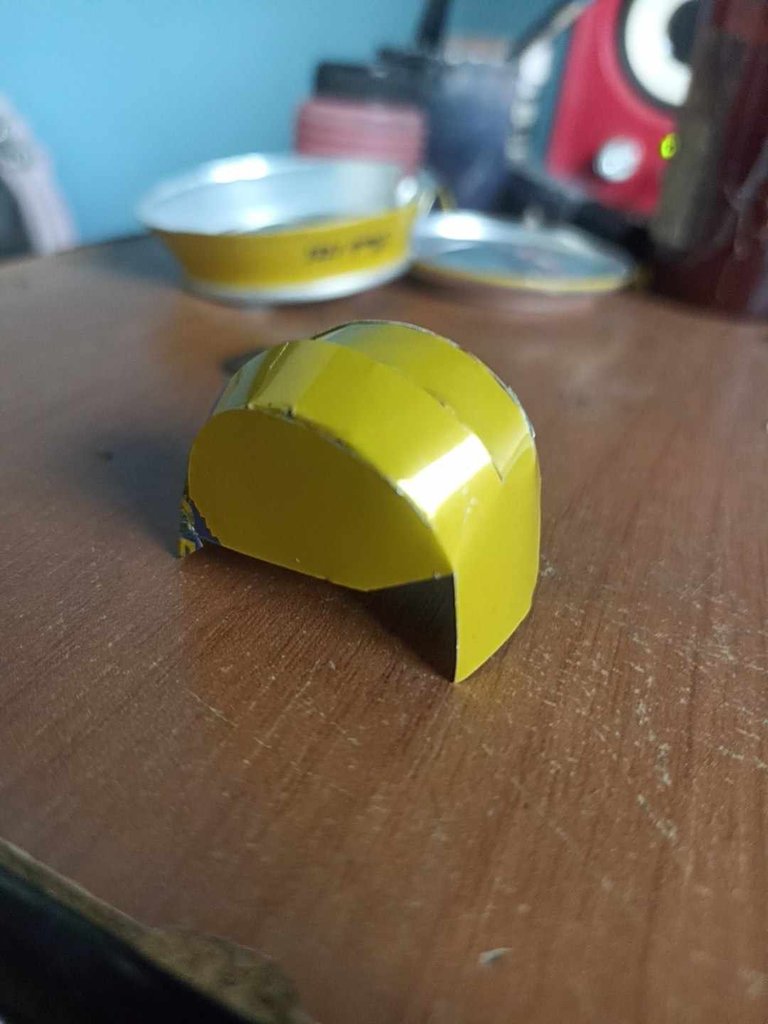
Then comes the turn of the lower part of the mask, where the jaw area goes, in the same way I cut the template and join it on the sides until the entire figure is completed. After having both pieces, I join them together and thus the head would be completed.
Después sigue el turno de la parte inferior de la máscara, donde va la zona de la mandíbula, de igual forma corto la plantilla y la voy uniendo por los lados hasta completar toda la figura. Después de tener ambas piezas las uno entre ellas y así se completaría la cabeza.
 |  | |
|---|---|---|
 | 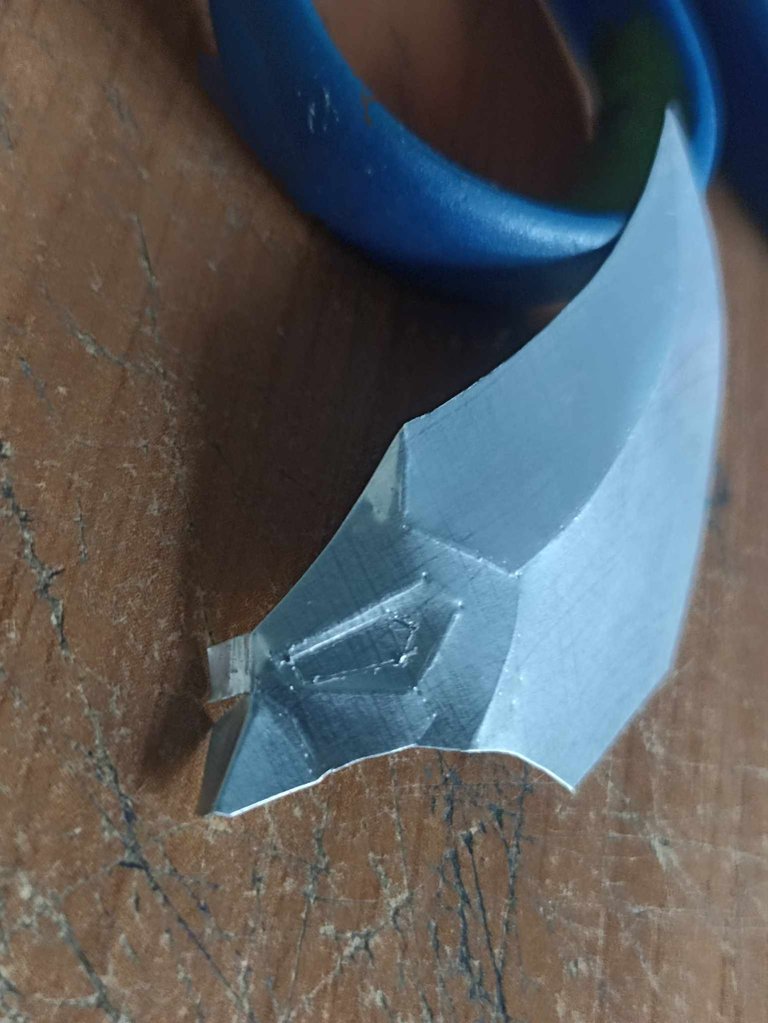 |
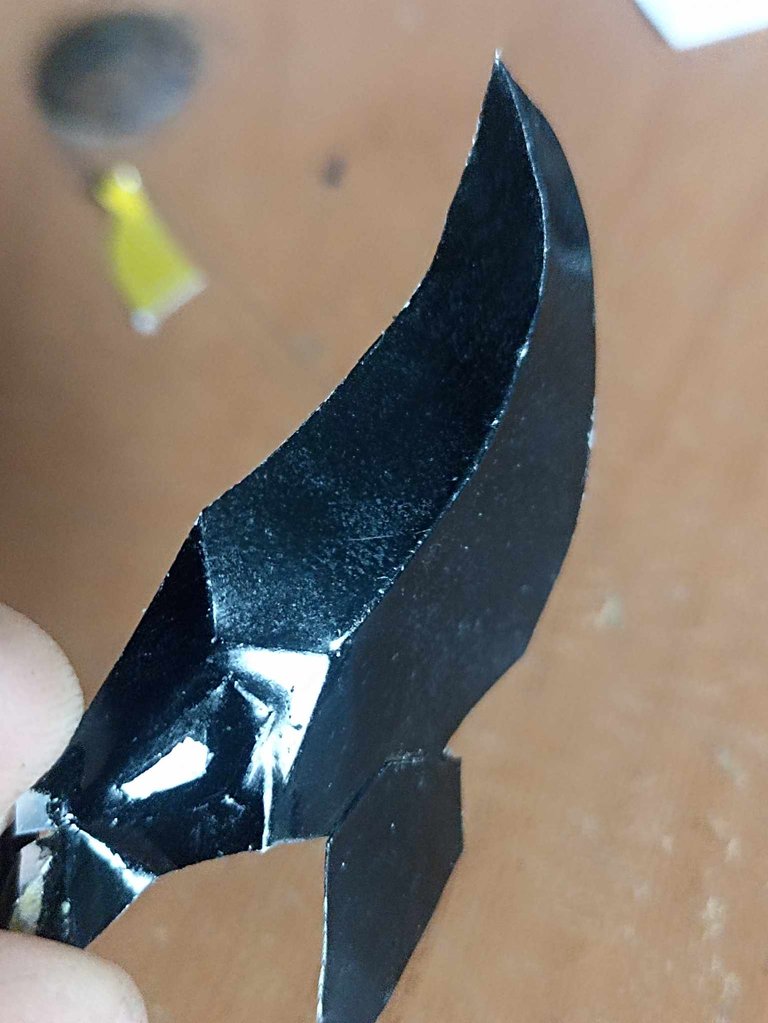
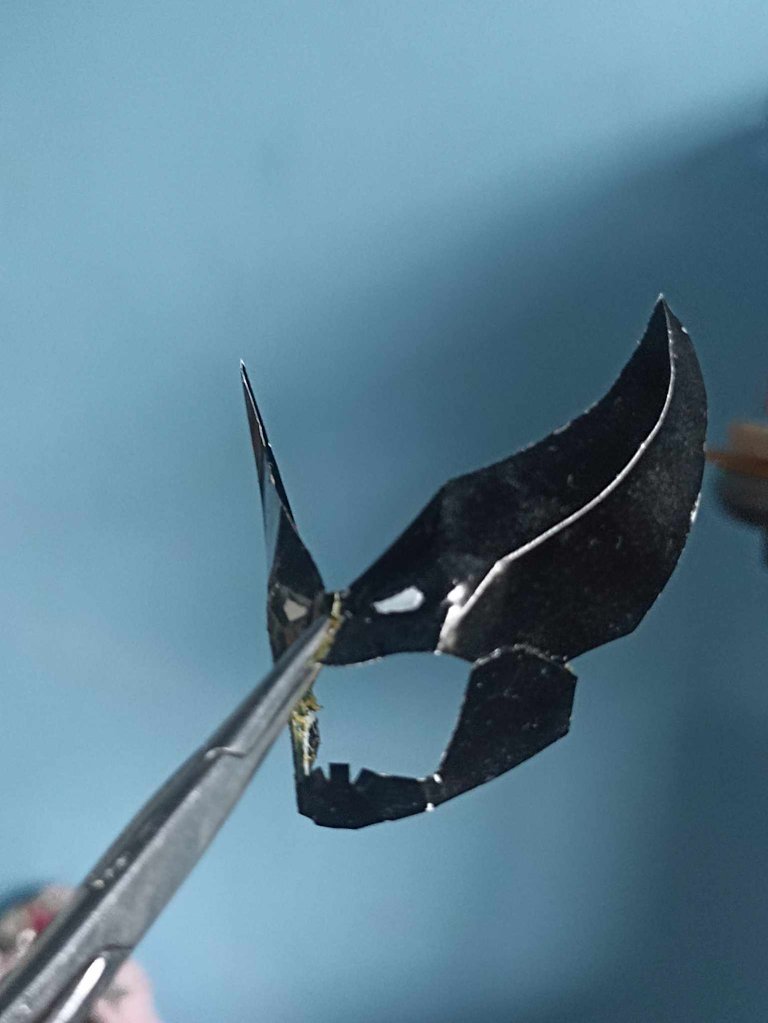
I think the most important part of the whole work is this, since it is what makes Wolverine's mask so special, and those are those big black ears, similar to Batman's, I think that is what makes him look threatening and aggressive, I also make these of course with aluminum, and the part where the eyes go I shape them with the tip of a pen, this part would be with the expression lines.
La parte más importante de todo el trabajo creo que es esta, ya que es lo que hace a la máscara de Wolverine tan especial, y eson esas grandes orejas de color negro, similares a las de Batman, creo que es lo que lo hace ver amenazador y agresivo, estas también las hago por supuesto con aluminio, y la parte donde van los ojos las voy moldeando con la punta de un bolígrafo, esta parte sería con las líneas de expresión.
 |  |  |
|---|---|---|
 |  |  |
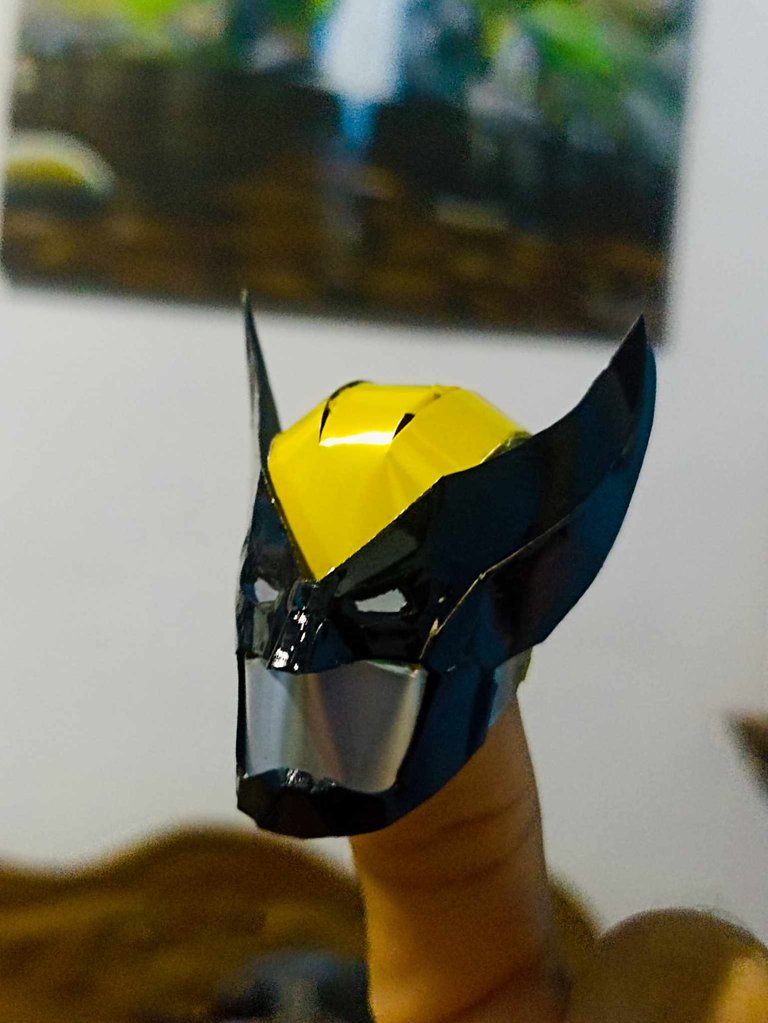
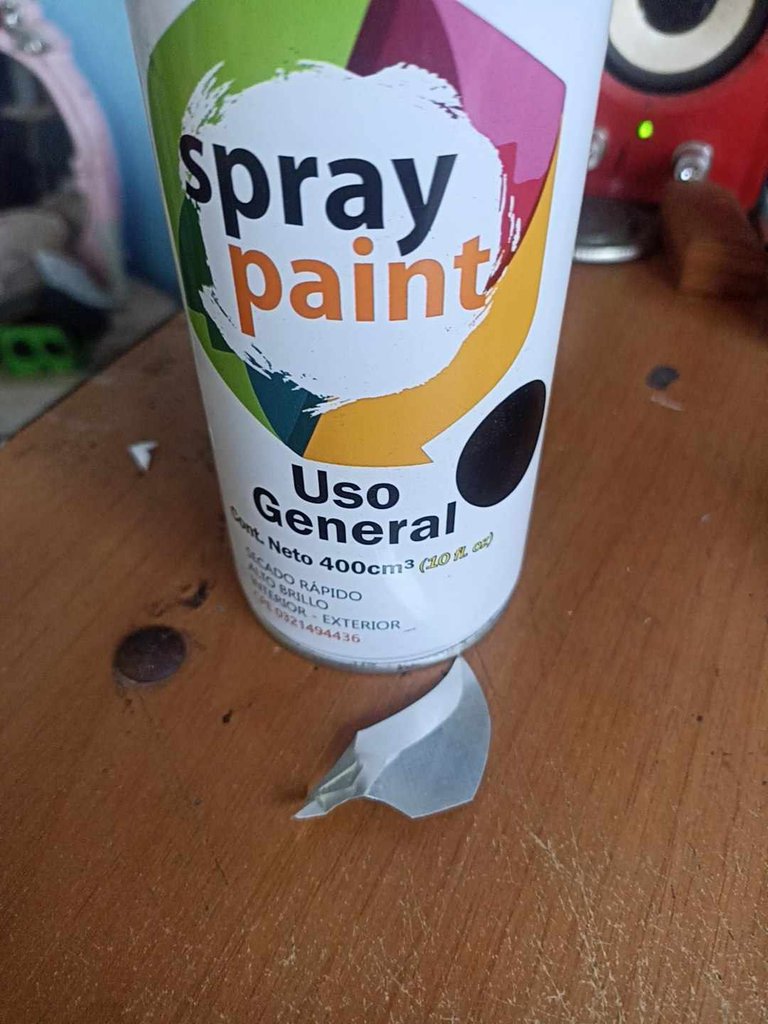
Next, and to give it the best finish, I painted the pieces I made black using glossy black spray paint. Another part that I also made and added to the mask is the chin protector. By joining both pieces it was easier to apply the paint. . Then it was time to join both pieces, the head part with the black part.
Seguidamente y para darle el mejor acabado pinto las piezas que hice de color negro utilizando pintura en spray negro brillante, otra parte que también hice y añadí a la máscara es el protector de la barbilla, al unir ambas piezas quedó más facil de aplicar la pintura. Ya luego era unir ambas piezas, la parte de la cabeza con la parte de color negro.
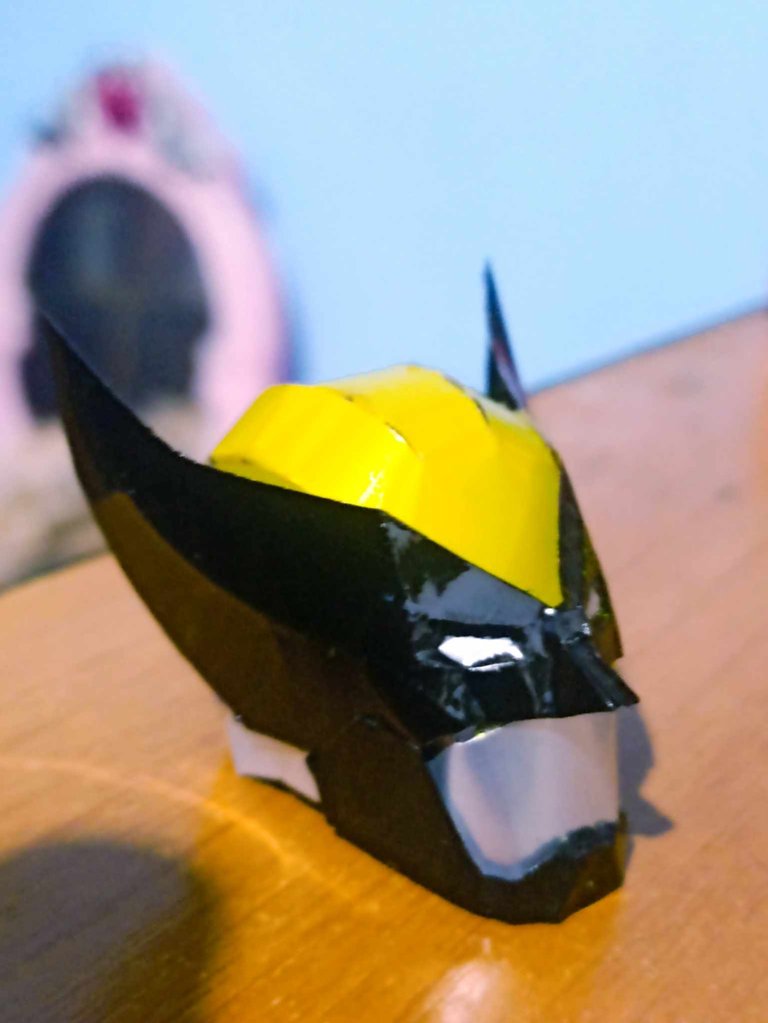
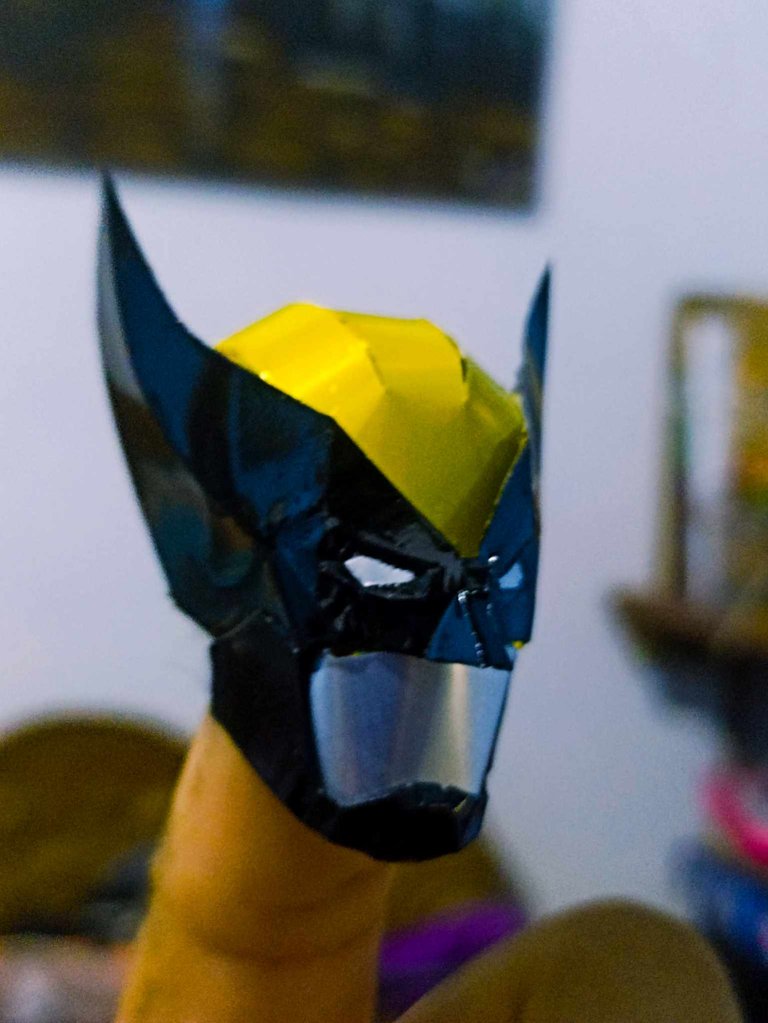
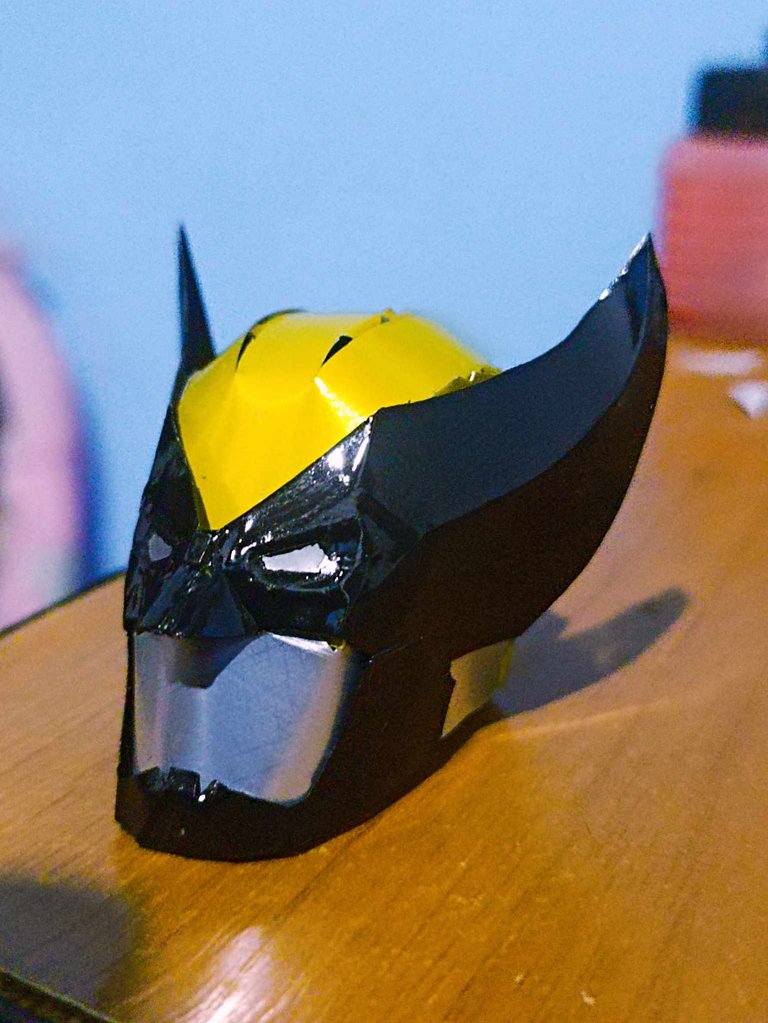
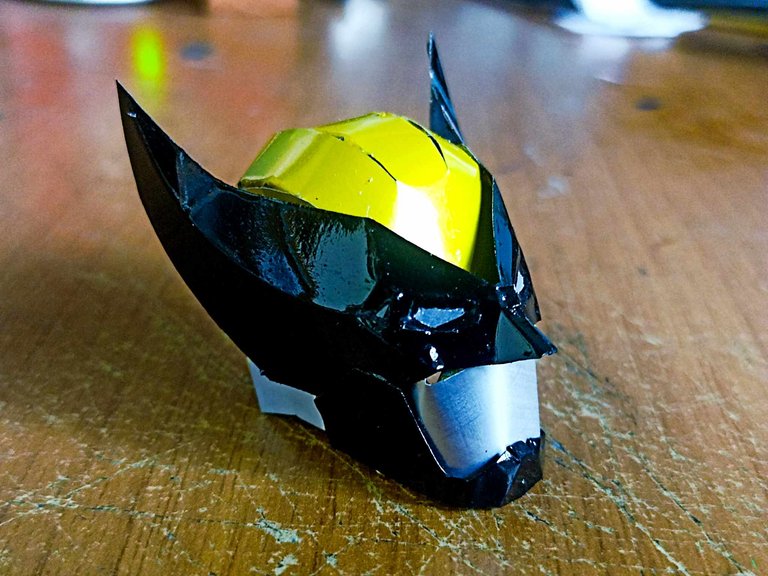
What did you think of the result? The black color was very shiny, thanks to the spray paint, on the other hand, the yellow looks a little dull because it is the color that came with the can. I think that with a shiny varnish it would look much better, but I am satisfied with the results. I hope you liked my contribution, don't forget to comment what you thought, I'll say goodbye soon.
Qué les ha parecido el resultado? El color negro quedó muy brillante, gracias a la pintura en spray, en cambio el amarillo se ve algo opaco porque es el color que traía la lata, pienso que con un barníz brillante luciría mucho mejor, pero he quedado conforme con los resultados. Espero que les haya gustado mi aporte, no olviden comentar que les ha parecido, me despido hasta pronto.
Quedó genial ✨☺️
me alegra mucho que te haya gustado como quedó!
Hola.
Te quedó genial este proyecto. Trabajas muy bien con estos materiales. Te felicito 😃
son algo peligrosos pero con cuidado se pueden hacer cosas muy buenas
Si. Eso lo sé. Una vez lo intenté y desistí, no es para mí 😃
The Beauty is in the details. Nice work
Thank You 💪💪
Congratulations, your post has been curated by @dsc-r2cornell. You can use the tag #R2cornell. Also, find us on Discord
Felicitaciones, su publicación ha sido votada por @ dsc-r2cornell. Puedes usar el tag #R2cornell. También, nos puedes encontrar en Discord
Muchísimas gracias por su apoyo
De verdad tu destreza a la hora de elaborar tus trabajos es única.
Felicitaciones y muchas gracias por compartirlo.
Muy buen trabajo.
Saludos.
Que lindas palabras y muchas gracias a ti por pasar por aquí. Es todo un gusto poder compartir
Como siempre tú dedicación y esfuerzo se notan en tus proyectos, bien trabajo amigo
Gracias hermano, siempre es un gusto poder compartir por aquí
Que chevere te quedó! que tan resistente queda? se aplasta fácilmente o queda mejor para dejarla de exhibición? me provoca intentar hacer algo así, tengo muchas latas guardadas esperando por una manualidad jaja. saludos!
si aguanta los golpes porque no pesa nasa, ahora si le caes encima si es facil de quedar aplastado. también puede hacerlo en un tamaño más grande y ponerlo de adorno. Pensaba hacerlo en grande pero no encontré latas suficiente. Creo que le tocará a otro súper héroe jejej
Oh, wow 😯, muy bien 👍🏻, no sabía que el aluminio de las latas se pegaba con cola blanca 🤔 jajaja ¿O usaste otro tipo de pegamento?
Utilice pegamento amarillo..el blanco es solo para pegar las.plantillas de papel.. el pegamento amarillo es el mejor, eso queda muy soldado
Ah ok ¿Ese amarillo es el que usan los zapateros? ¿El pega sold?
Ese mismo pegamento. Una vez que el aluminio queda pegado es muy difícil que se suelte.
Excelente 👍🏻, gracias por la información 😉
¡Felicidades! Esta publicación obtuvo upvote y fue compartido por @la-colmena, un proyecto de Curación Manual para la comunidad hispana de Hive que cuenta con el respaldo de @curie.
Si te gusta el trabajo que hacemos, te invitamos a darle tu voto a este comentario y a votar como testigo por La Colmena.
Si quieres saber más sobre nuestro proyecto, te invitamos a acompañarnos en nuestro servidor de Discord.
Gracias al equipo de @la-colmena por su gran apoyo
Excelente trabajo como siempre, te ha quedado muy asombroso el llavero, ya quisiera unos así de Wolverine y de Deadpool